
You have copied a sound ID, but nothing plays. Before replacing the number, identify where playback fails. A website preview, a Studio test, and playback inside someone else’s experience are different situations.
The cause might be a format mismatch, missing permissions, an unavailable asset, or a player with no working output path. Follow these six checks to narrow it down.
AI-generated editorial illustration.
Locate the failure before changing the number
Write down where you first notice the silence. Can you hear the website preview? Does the sound load in Studio? Does it work when you join the published experience? These observations describe different stages, and comparing them prevents you from changing settings in the wrong place.
Also note whether the problem affects one resource or every sound. If a single new effect fails while existing music still plays, start with that resource and its setup. If the entire experience becomes silent, inspect the client and overall playback configuration before investigating dozens of separate IDs.
Keep a short record of the resource number, the experience being tested, and the exact action that should trigger it. “The sound is broken” gives you little to compare. “This effect stays silent when the door opens in the published group experience” identifies a specific test you can repeat.
1. Check whether the game supports custom audio
If you are using a Boombox, Radio, or custom hit-sound feature in another creator’s experience, read that game’s instructions first.
Check whether it:
Allows custom audio IDs at all.
Requires a particular item or feature to be enabled.
Accepts only selected resources.
Expects digits rather than a full link or asset URI.
A correct audio ID cannot add a feature the game has not implemented. Knowing an asset number also does not let you change another creator’s experience permissions.
If you are working on your own Studio project, continue with the asset and playback checks below.
2. Confirm the resource type and input format
Make sure you copied an audio asset ID, not an image, model, or video number. Open the corresponding result in the audio library and compare the title and number with what you pasted.
Use the format the destination expects:
Destination | What to enter |
|---|---|
A game field asking for a numeric sound ID | The digits only |
A Studio string property accepting an asset URI |
|
A browser address bar | The full asset-page URL |
Remove accidental spaces and make sure you did not copy a neighboring result from a list. Adding a prefix cannot grant access to an asset or change its type.
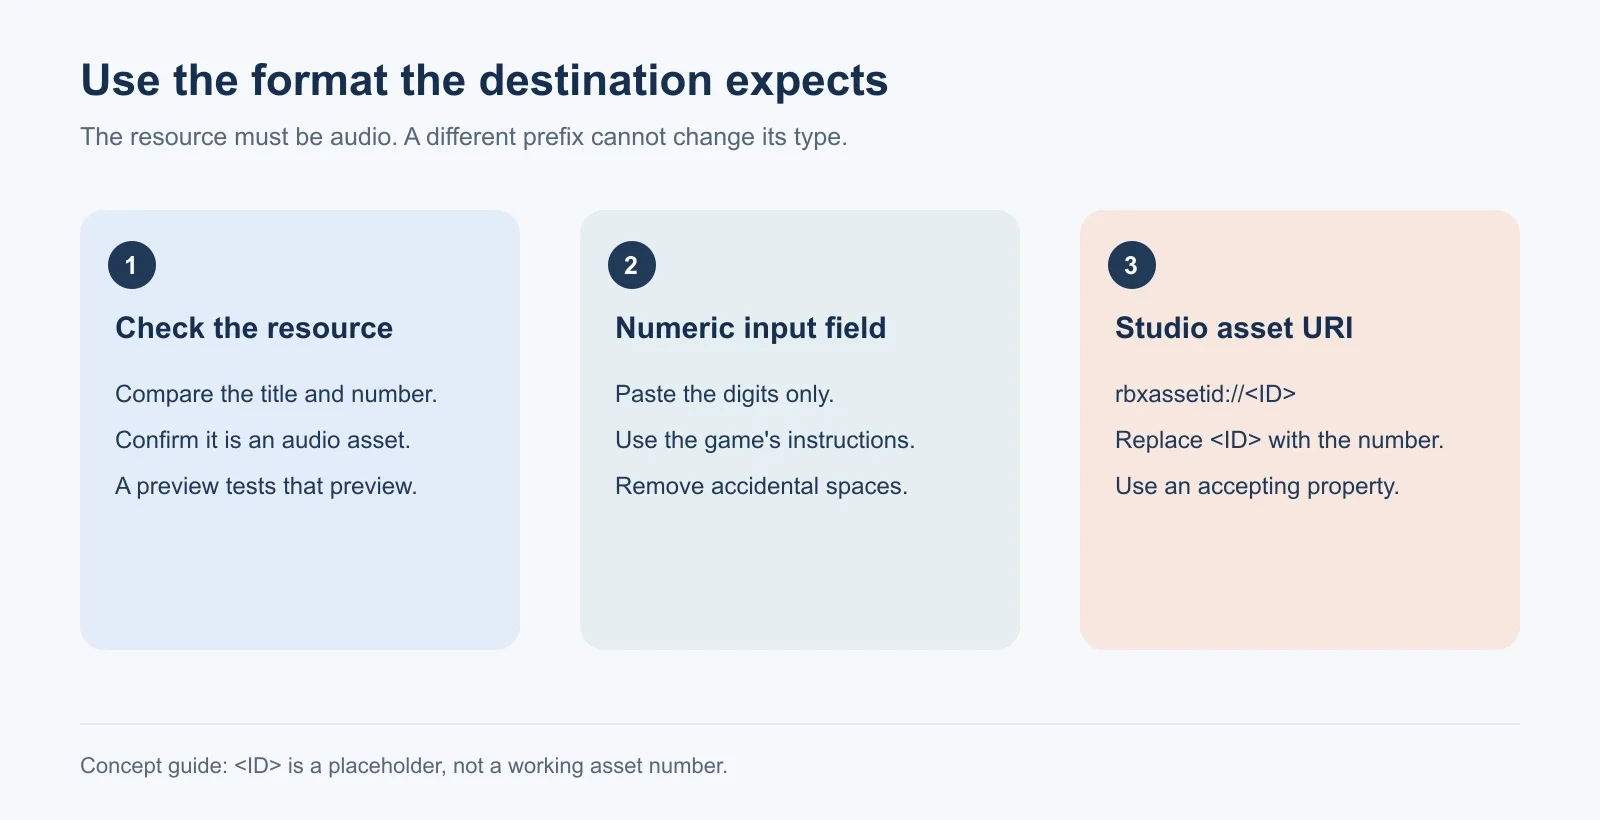
Format guide, not a website screenshot. Replace <ID> with the actual resource number.
3. Check access for the target experience
An asset can have visible metadata while the target experience cannot use its content. For your own uploads, inspect the audio asset’s configuration and sharing options in Creator Dashboard.
Confirm both the resource owner and the experience that needs access. An audio file uploaded by your personal account and a game owned by a group should not be treated as the same ownership context.
Roblox’s audio asset documentation explains that imported audio has privacy controls and can be shared with specific creators and experiences. Permission to inspect a resource does not establish that every project can play it.
For restricted audio owned by someone else, obtain the appropriate access or choose another resource available to your project. Changing the number or its prefix will not solve a permissions problem.
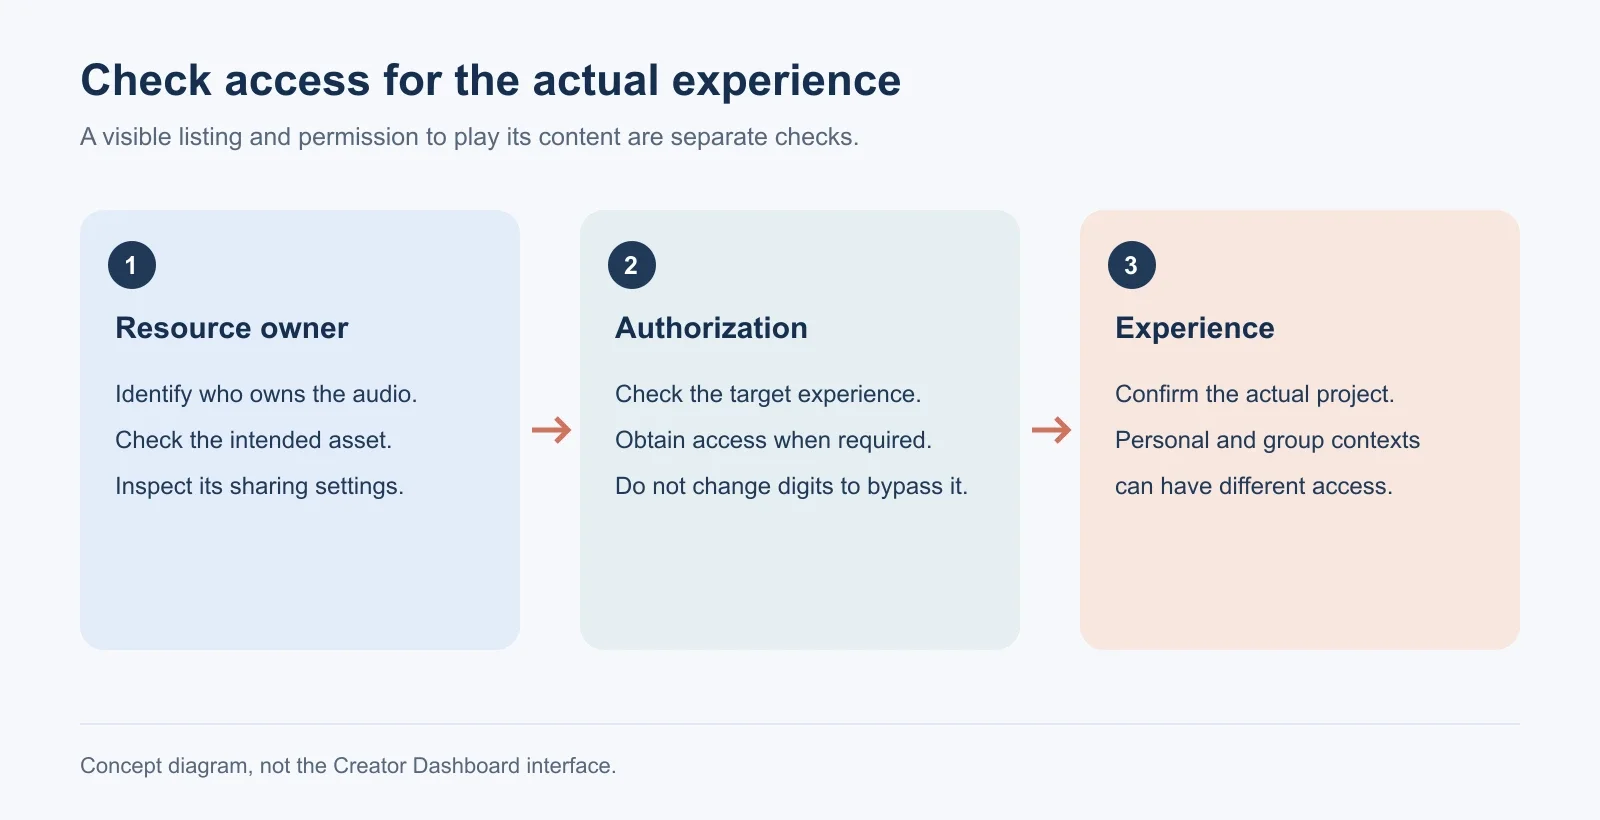
Concept diagram. Inspect the actual asset’s sharing settings in Creator Dashboard; this is not a permissions screenshot.
Separate asset ownership from project ownership
For example, imagine that you uploaded audio through a personal account, then used it while editing a group-owned experience. Seeing the upload in your account does not settle what the group’s experience can load.
Confirm that you are inspecting the intended asset and the intended project. Similar project names, test versions, or a different ownership context can make it easy to check a configuration that does not belong to the place you are actually joining.
Use an existing authorized resource in that same experience as a comparison. If it works, keep the playback setup unchanged while checking the new resource. This isolates the access question more effectively than rebuilding the player each time you try another number.
4. Check moderation and resource availability
If a resource is awaiting moderation, has been removed, or is otherwise unavailable, correct playback code may still produce no sound.
For your own upload, inspect its current status in Creator Dashboard. For a third-party resource, check its official listing and any available status information.
Treat an old list’s “working” label as historical information. A cached preview on another website does not prove that Roblox can currently deliver the asset to your experience.
Check whether the expected sound starts later in the file
If you can preview the resource, listen beyond the first instant and confirm where its main content begins. A clip with a quiet opening can appear unresponsive when your event expects an immediate impact. It may be a timing mismatch rather than a failure to load.
Compare the full preview with the portion your game actually plays. If your logic stops the player before the main sound starts, changing the volume will not solve the timing problem. Use an appropriate shorter resource or adjust the event with a clear understanding of the source. Avoid raising the volume aggressively just to compensate for an opening that is quiet.
5. Simplify the Studio playback setup
Test one sound in a simple scene. Temporarily remove random selection, region checks, and other event conditions so you can see whether the resource itself loads and plays.
Open Output and record any loading or permission error. Then inspect the object you are using.
Object | First things to check |
|---|---|
|
|
|
|
For direct output with modular audio, a simple route is:
AudioPlayer → Wire → AudioDeviceOutput
Creating an AudioPlayer alone does not establish a complete audible path. Roblox’s audio objects guide explains how players and output objects connect; the AudioPlayer reference lists its loading and playback properties.
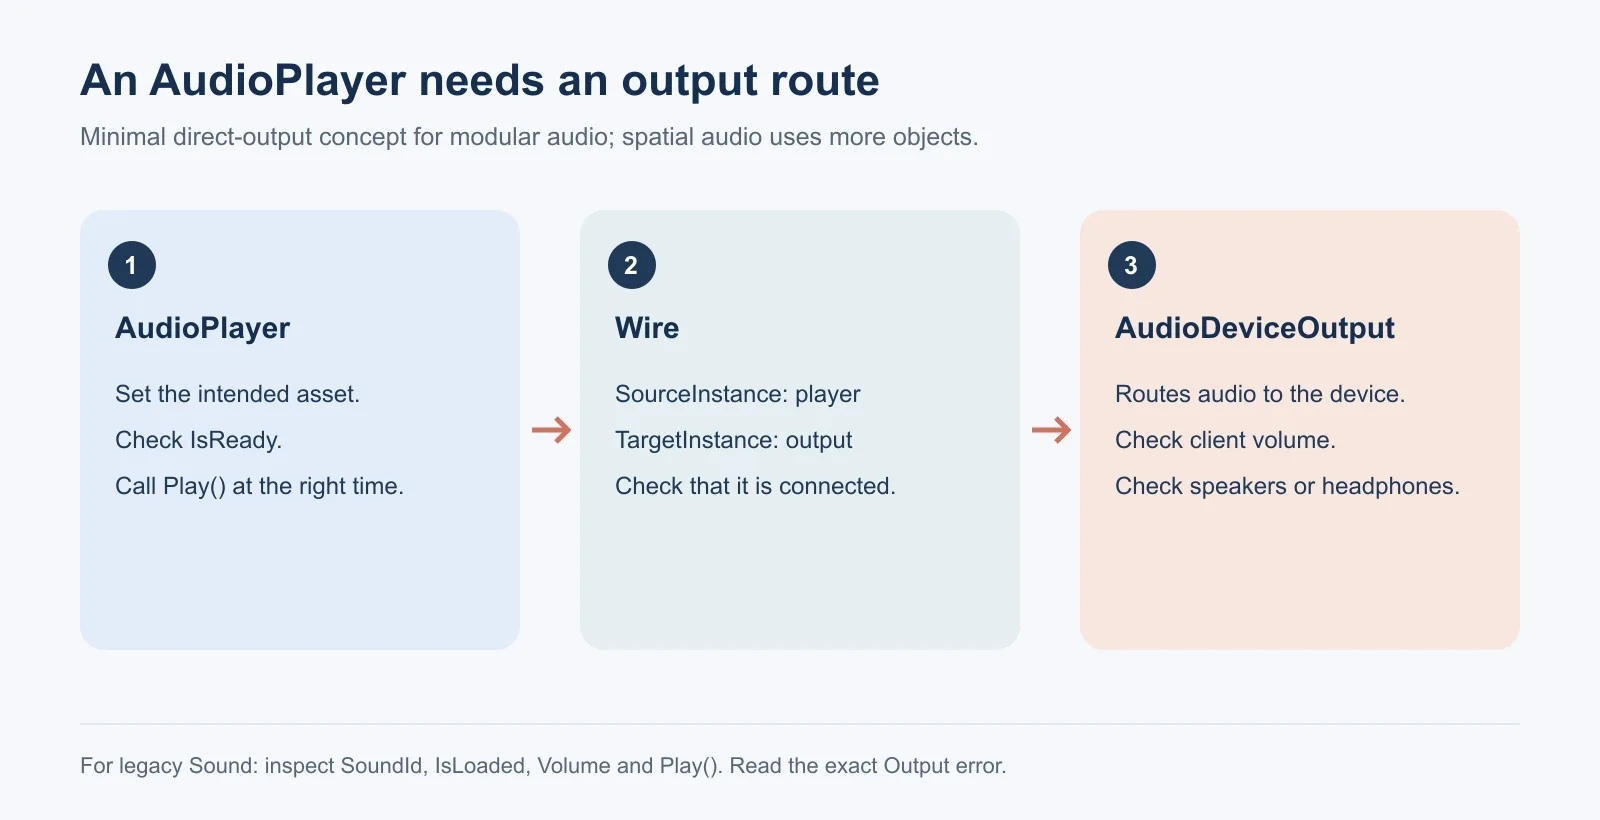
Direct-output concept diagram, not a Studio screenshot. Record your own Output message; the diagram does not represent a tested project.
If playback works in the simple test but fails after restoring your event logic, investigate when the code runs, whether the trigger fires, and whether the object still exists. That result points you toward the playback logic rather than automatically toward a dead ID.
Read the error before choosing a fix
Preserve the wording of the Output message rather than reducing every failure to “invalid ID.” A resource-loading error, an access message, and a script error can require different actions.
If the script fails before calling the player, there may not have been a playback attempt at all. Inspect the error’s location and determine whether execution reached the intended action. If playback starts but the sound cannot be loaded, move back to the reference and resource checks.
Avoid changing the resource, script, volume, and object location together. Make one adjustment, repeat the same trigger, and compare the result. Otherwise a successful test may leave you unsure which change solved the problem.
Distinguish loading from an audible result
The player’s loading status is useful evidence, but it is only part of the chain. A resource can be ready while the configured output, volume, or location prevents you from hearing what you expected.
For a positional effect, compare a nearby listening position with the location where it seems silent. For modular audio, inspect where the stream goes after the player. For a script-driven event, confirm that you are observing the same client and event context in which playback is expected.
Do not use the length of a waiting period as the only diagnosis. If a resource takes longer than expected to become ready, inspect Output and the surrounding conditions instead of immediately labeling it permanently unavailable.
6. Check the client and actual runtime environment
Check Roblox’s volume, the operating system volume, and the selected speakers or headphones. If all game audio is silent, start here before replacing individual assets.
Next, compare environments:
Works in Studio, fails in the published experience: check the actual experience’s asset access and client errors.
Works nearby, disappears elsewhere: inspect distance and spatial-audio settings.
Works in your project, fails in another creator’s game: check that game’s supported inputs and resource restrictions.
For older Sound-based projects, the Sound reference documents the relevant properties. For modular audio, inspect the connected output route as well as the asset number.
Use a known-good sound as a control
Choose one sound that already plays in the same experience and compare it with the resource you are investigating. Keep the player settings and trigger identical.
Result | Where to look next |
|---|---|
Neither sound plays | Player setup, script execution, volume, and output |
Only the new resource fails | That resource’s status, reference, and permissions |
Both work in Studio but fail after publishing | Published-experience access and runtime configuration |
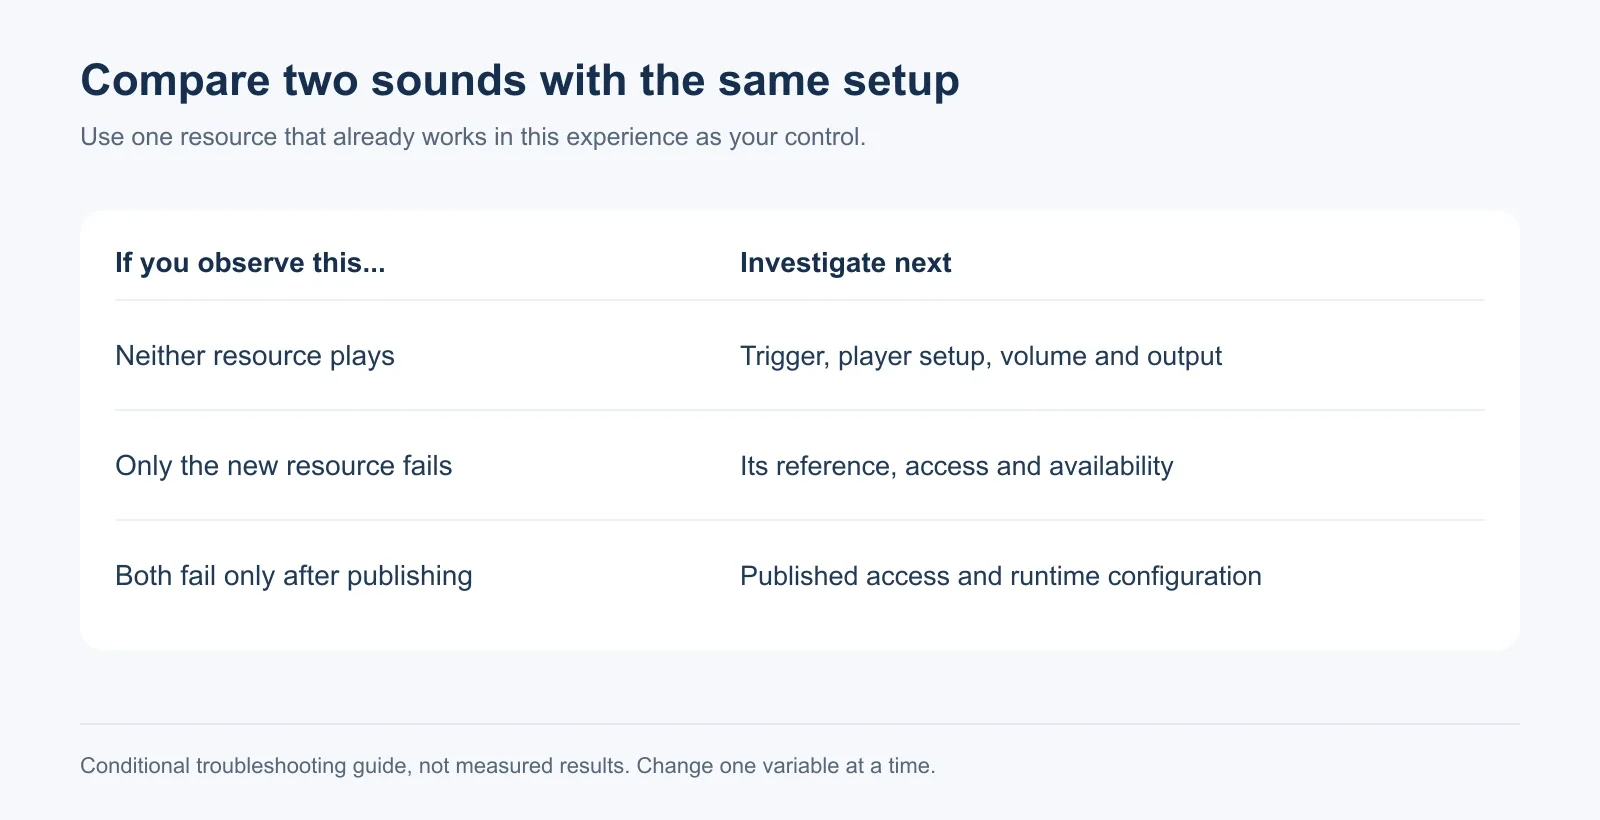
Use these comparisons to plan your next check. They are conditional examples, not recorded playback results.
Three examples of narrowing the cause
The preview plays, but a custom hit sound does not
You can hear a clip on the website, but entering its number in another creator’s game produces no sound. Begin with that game’s instructions and check whether the field accepts the resource type and format you used.
If you cannot edit the experience, focus on the settings available to you. You cannot repair its server-side playback logic or grant it access to another creator’s restricted resource. Compare a resource documented by the game, when available, and keep the result separate from whether the website preview succeeds.
A door sound works in a simple scene, then disappears
You test the resource with a single player and hear it successfully. After attaching it to your full door interaction, it stays silent. That comparison suggests checking the event path before replacing the audio.
Confirm that the door event fires, that the player object is still present, and that another part of the interaction does not stop or replace it. If the sound is positional, listen near the door while checking the intended distance settings. Restore additional behavior one part at a time until you can reproduce the failure.
An individual project works, but the group version does not
Treat the two experiences as distinct test environments. Record which one plays the sound, then inspect the failing project’s resource access and runtime setup.
Use the same player configuration and trigger where possible. If you also change the script while transferring the resource, you introduce another possible cause. A controlled comparison helps you tell whether access, project configuration, or the changed logic explains the difference.
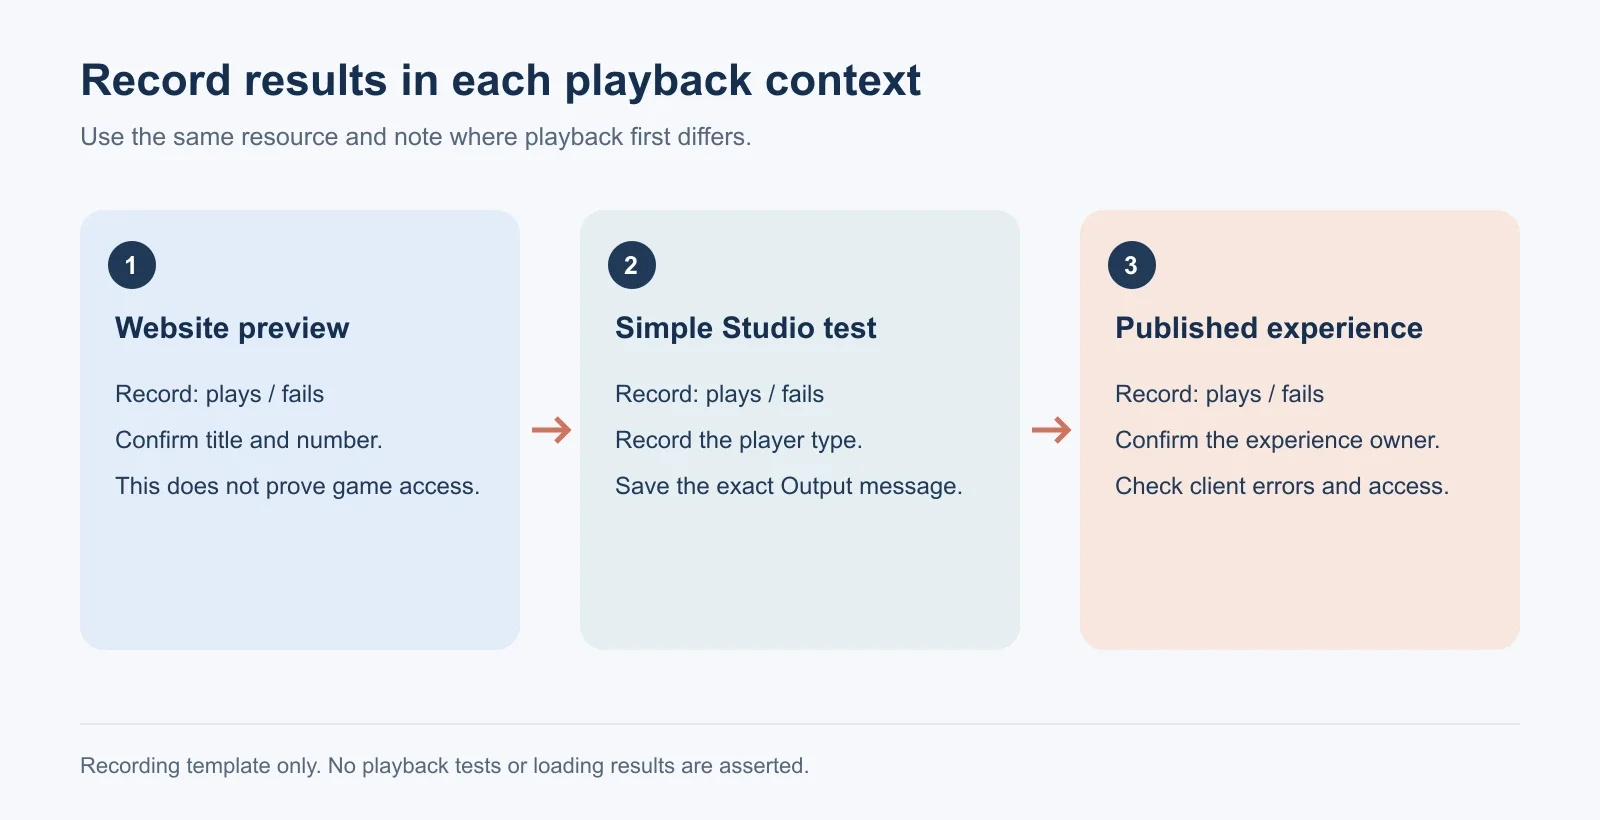
Recording template. Fill in your own playback results and exact errors for each environment.
What to include when asking for help
Provide the asset number, the player type, the expected trigger, and the environment where it fails. Include the exact Output message if there is one. If another sound works with the same settings, mention that result too.
A small reproduction is more useful than a screenshot of an entire complex project. Reduce the setup to the player and the action needed to demonstrate the problem, while retaining the ownership and access context relevant to the failure.
Keep private account details out of a public help request. The useful evidence is the resource, the failure, and the configuration involved; you do not need to share credentials or unrelated project information to explain those.
When should you replace the audio ID?
Look for a replacement when the resource is unavailable or you cannot obtain access for your project. Browse sound effects by the job you need the sound to do, such as footsteps, a button response, or wind.
Preview the replacement, then test it in the intended experience. Website preview success does not guarantee access in every game, and preview failure alone does not establish that the ID is incorrect.
For an important interaction, keep a tested alternative so you can replace an unavailable resource without redesigning the whole event.
Frequently asked questions
The game feature and the asset’s permissions are separate requirements. Playback still depends on the game’s rules and the resource’s availability and access settings.
Only upload content you have the rights to use. Reuploading should not be used to bypass another asset’s access restrictions.
No. Previewing and experience playback use different contexts. Confirm that the resource is available to the actual experience and that your playback setup works.
It also needs a suitable output route. Check the Wire connections and output objects, then inspect loading status and Output errors.
Explore More Audio in robloxidshub!
Just find your favorite audio use in roblox!